

Windows 11, the latest operating system from Microsoft, offers many exciting features and enhancements. However, one Common issue that users often face is slow WiFi connectivity. Fear not! With some simple steps and troubleshooting techniques, you can easily diagnose and fix this problem to boost your browsing experience on Windows 11. Begin by checking if your WiFi router is placed in an optimal location; obstructions or distance could weaken the signal strength. Next, ensure that your network adapter drivers are up-to-date, as outdated drivers can cause connectivity issues. Additionally, adjusting power settings to prevent automatic shutdown of the WiFi adapter when not in use can help maintain a steady connection.
If these initial measures don’t yield satisfactory results, consider disabling unnecessary startup programs or performing a clean boot to eliminate potential software conflicts. Another effective tactic involves modifying advanced settings such as channel width or QoS (quality of service) options in your router’s configuration page for better performance optimization tailored to Windows 11. By patiently following these guidelines and employing other proven strategies like resetting the TCP/IP stack or upgrading firmware versions for both modem and router devices, if applicable, you will be able to bid farewell to slow WiFi woes and embrace seamless browsing on Windows 11 with renewed vigor!
Turn off the metered connection.
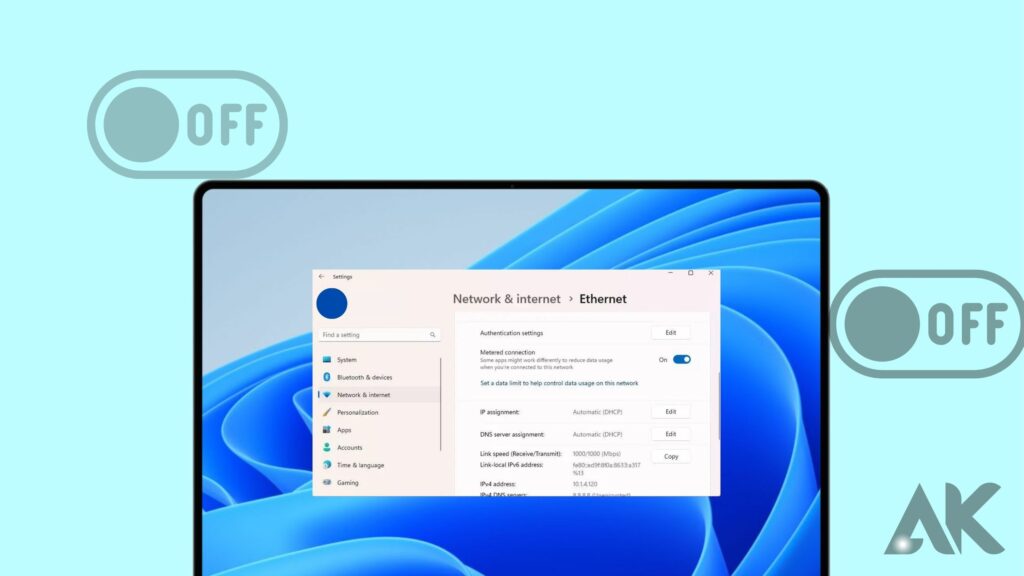
Configuring your Windows internet connection to be regulated is an excellent way to always be aware of your data usage. However, this may obstruct the efficient utilization of the internet by Windows applications, resulting in sluggish internet speeds. Therefore, you should immediately disable the metered connection option for your Windows network.
Step 1 is to activate the Settings application by selecting the gear-shaped icon from the Start menu.
Step 2 is to select Wi-Fi from the Network & Internet page.
Step 3: To access the properties of your Wi-Fi network, click on it.
Step 4: Disable the total metered connection method.
Disable downloads from other PCs.
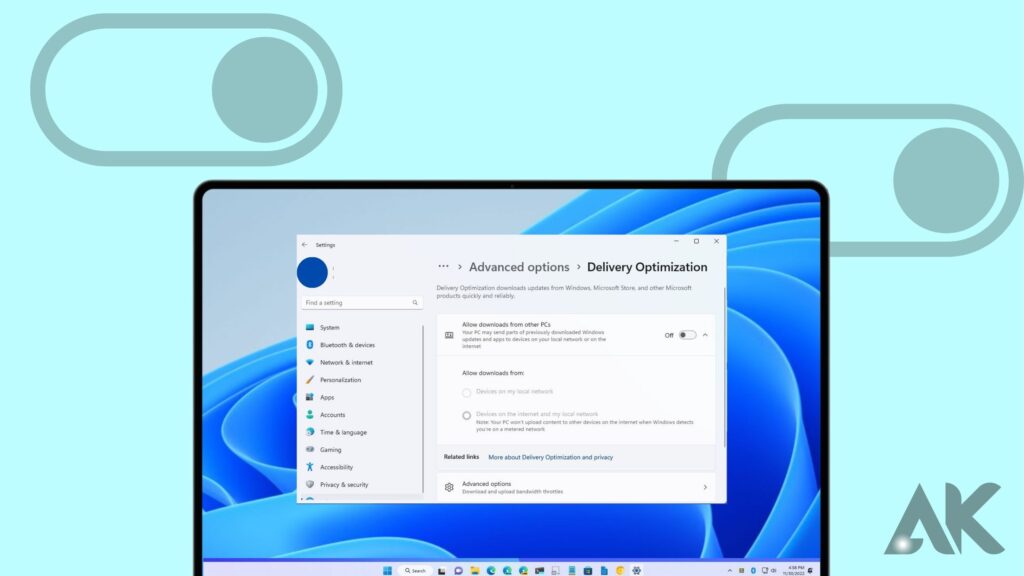
The online functionality of Windows 11 enables the transfer of Windows updates from other networked computers. This feature can be advantageous when an internet connection is rapid, but it can cause substantial delays when the connection is sluggish. You can disable downloads from other computers as follows:
Press Windows + I to launch the Settings application.
In the left pane, select Windows Update; in the right pane, choose Advanced Options.
Select delivery optimization in
Toggle off Allow downloads from other computers.
Limit the download bandwidth settings.
To enhance internet effectiveness, one might consider implementing a download bandwidth restriction. This feature will allow you to engage in concurrent activities, such as streaming or gaming, without experiencing any interruptions caused by slow internet connections or latency, even while updates are being applied. To restrict download bandwidth, execute the subsequent procedures:
To access the Settings application, press Windows + I.
Select Windows Update in the left pane, then Advanced Options in the right pane.
Select for delivery optimization.
Choose “Advanced Options.”
Within the Absolute bandwidth section, select the boxes entitled Limit bandwidth usage for downloading updates in the background and Limit bandwidth usage for downloading updates in the foreground.
Fix Slow WiFi bandwidth settings.
Windows 11 assigns 20% of your internet bandwidth for system applications, Windows updates, and other activities; therefore, you can only use 80% of it for personal purposes. Personal users can augment the available bandwidth by adjusting the reservation limit. The process is as follows:.
Press Windows + R, enter gpedit.msc, and press Enter.
Double-click the QoS Packet Scheduler after navigating to Computer Configuration, Administrative Templates, and Network in the Local Group Policy Editor.
Double-click Limit reservable bandwidth in the right pane to proceed.
Click Apply and OK after selecting Enabled and reducing the bandwidth limit to zero.
End high-data-consuming processes.
By terminating the most data-intensive processes on your computer, you enable other applications to utilize the additional bandwidth. The following describes how to terminate processes in Windows 11. Enter “resource” into the Start menu before selecting the Resource Monitor application. An inventory of active processes and the data they consume will be displayed. Right-click a process that is significantly consuming bandwidth and select End Process. One may duplicate this procedure for an unlimited number of processes.
Update the network driver.
It is best practice to maintain updated network drivers because corrupted or out-of-date drivers can hurt internet performance. Follow the instructions provided below to update your network driver.
From the Start menu, select Device Manager with a right-click.
Right-click on your driver within the Network Adapter category and choose Update Driver.
Select Automatically search for drivers.
Conform to the wizard’s instructions to obtain and install any available updates.
Turn off Windows auto-tuning.
Windows Auto-Tuning modifies the extent of the receive window for every TCP connection. While concurrent data transmission may be enhanced, this may obstruct the progress of already sluggish connections. Turn it off by following the steps below:
Press Windows + R to access the Run dialogue; to start an elevated Command Prompt, input cmd and press Ctrl + Shift + Enter.
After entering the following script and pressing Enter, confirm that the Receive Window Auto-Tuning Level is set to Normal.
Normal is enabled by default, denoting its status. Enter the following script, followed by Enter, to deactivate it.
Disable background applications.
Background applications, despite not being observable on the computer screen, consume bandwidth similarly to other applications. By deactivating them, bandwidth will be made available, facilitating the operation of other applications that depend on the Internet. How to deactivate background applications:
Windows + R will launch the Settings application.
In the left pane, select Apps; then, in the right pane, select Installed Apps.
Select Advanced Options by clicking the ellipses (three horizontal dots) next to any background application.
Instruct this application to never operate in the background.
Conclusion
Windows 11 is a new operating system from Microsoft that offers numerous features and enhancements. However, users often face slow WiFi connectivity issues. To fix this problem, follow these simple steps and troubleshooting techniques:
1. Check if your WiFi router is placed in an optimal location; obstructions or distance could weaken the signal strength.
2. Ensure that your network adapter drivers are up-to-date, as outdated drivers can cause connectivity issues.
3. Adjust power settings to prevent automatic shutdown of the WiFi adapter when not in use.
4. Disable unnecessary startup programs or perform a clean boot to eliminate potential software conflicts.
5. Modify advanced settings such as channel width or QoS (quality of service) options in your router’s configuration page for better performance optimization tailored to Windows 11.
6. Limit download bandwidth settings to ensure smooth internet usage.
7. Tweak the internet bandwidth settings to increase personal use by tweaking the reservation limit.
8. End high-data-consuming processes to increase the bandwidth other applications may share.
9. Update the network driver to keep drivers updated and avoid corrupted ones.
10. Turn off Windows Auto-Tuning to adjust the receive window size for all TCP connections.
11. Disable background applications to free up bandwidth and run faster internet-reliant applications.
By following these guidelines and employing other proven strategies, like resetting the TCP/IP stack or upgrading firmware versions, users can improve their browsing experience on Windows.
FAQS
Why is my Wi-Fi so slow on my PC all of a sudden?
Why has my Wi-Fi suddenly become so sluggish? Common causes include being too far from the router, having insufficient bandwidth, encountering device-related issues, requiring network driver updates, or having an excessive number of devices connected to the network, some of which are streaming or consuming substantial amounts of data.
How do I increase my Wi-Fi speed on Windows 11?
Let’s investigate the process involved.
Apply the most recent Windows update.
Adjust the router’s position.
Unnecessary background applications must be terminated.
Turn off the metric connection.
Modify the DNS server.
Modify the Reservable Bandwidth Limit…
The Windows Update Services should be disabled.
Clear the cache of the DNS.
Does Windows 11 have Wi-Fi connection issues?
Important Takeaways. In most cases, Wi-Fi issues in Windows 11 can be remedied by resetting the device. To accomplish this, proceed along this path: Network Reset can be found under Settings > Network & Internet > Advanced Network Settings. Additionally, interference from gadgets like cordless phones and microwave ovens can cause Wi-Fi issues.