
Windows 11 takes wireless diagnostics to the next level with its advanced feature, “Map Your Network.” This innovative tool brings a whole new dimension to troubleshooting connectivity issues and ensuring optimal performance of your wireless network. With just a few clicks, Windows 11 allows you to gain valuable insights into your network’s topology, helping you visualize the different connected devices and their relationships. Gone are the days of blindly guessing which device is causing interference or slowing down your internet speeds.
Windows 11 empowers users by providing an intuitive interface that displays detailed information about each connected device, including signal strength, data usage, and even the type of connection being utilized (5 GHz or 2.4 GHz). Moreover, this powerful diagnostic tool offers real-time monitoring capabilities that enable users to identify potential bottlenecks in their network setup promptly. Whether it’s pinpointing rogue devices hogging bandwidth or detecting weak signal areas within your home or office space, Map Your Network equips users with invaluable knowledge for optimizing their wireless networks like never before.
Run the Internet Connection Troubleshooter.
Windows 11 includes integrated troubleshooters for resolving frequent problems with network devices and computer peripherals. The Internet Connection Troubleshooter can be used to scan the system for and automatically resolve common network issues.
To initiate the Internet Connection diagnostic tool:
To access Win + I, press Win.
In the left pane, select the System tab.
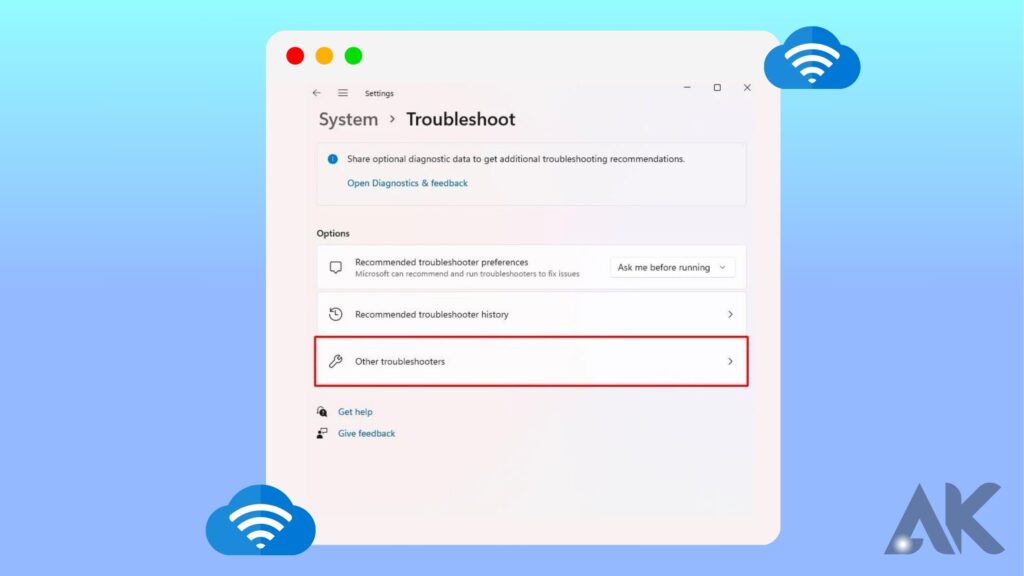
Scroll down in the right pane and select Troubleshoot.
In the Options menu, select Other troubleshooters.
Select the Run option to connect to the Internet. Windows will initiate the troubleshooter and display the problems it is capable of resolving.
Select the Troubleshoot My Internet Connection link. The troubleshooter will conduct a system assessment to identify any potential problems and provide suggested solutions. Implement the updates and assess for further enhancements.
If the problems continue to occur, proceed to utilize the Network Adapter troubleshooter. That is how to accomplish it.
To access Win + I, press Win.
Navigate to Troubleshoot > Other Troubleshooters from the System pane.
Select the Run option for the Network Adapter by scrolling down.
In the troubleshooter window, click Next after selecting All network adapters.
Please choose the suitable option and adhere to the instructions displayed on-screen. Implement the suggested solutions, if accessible, to reinstate your Wi-Fi connectivity.
The WiFi problem in Windows 11
WiFi issues in Windows 11 may present themselves in several different ways. The following are frequent symptoms that may be encountered:
- Incapable of establishing a WiFi connection
- Internet bandwidth slowness
- Intermittent gaps in connection
- Insufficient connectivity
- No WiFi adapter was located.
Common Reasons for WiFi Problems in Windows 11
Before going into the solutions, it is crucial to comprehend the frequent causes of the Windows 11 WiFi issue. These are some of the most frequent causes:
• Outdated equipment
An incompatible network adapter was encountered.
• File corruption in the system
DNS concerns
Problems with network configuration
Disturbance caused by external devices
Resolutions for Windows 11 WiFi Issues
In this analysis, we shall examine several resolutions for WiFi-related issues that may arise in Windows.
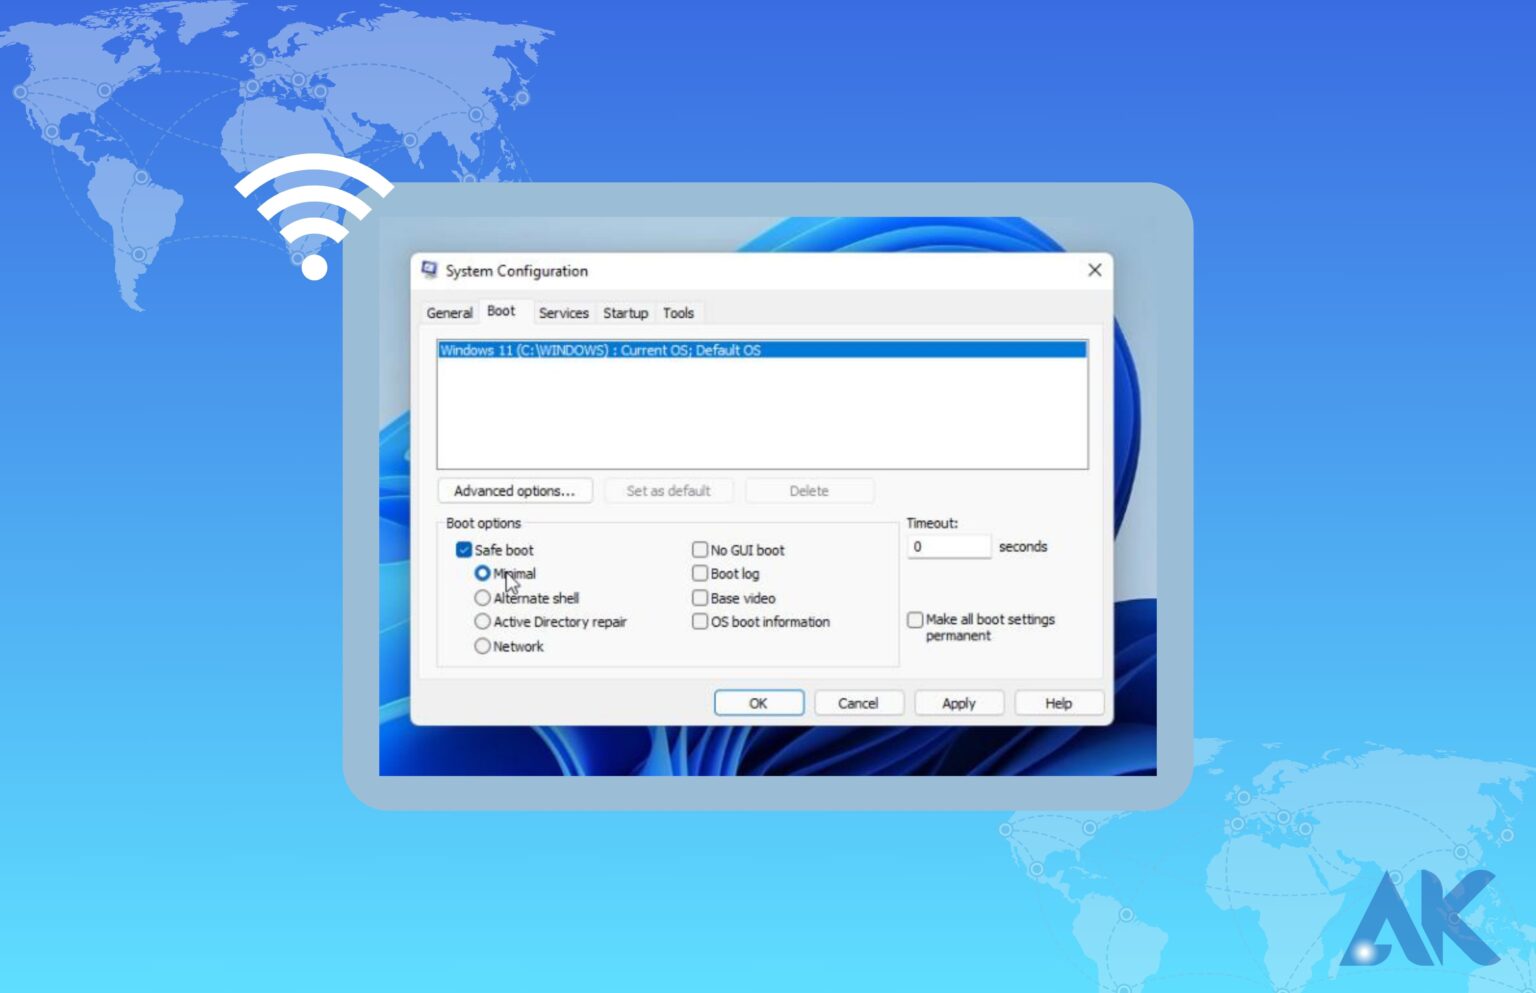
Solution 1: Restart Your Computer
A basic restart may occasionally resolve WiFi issues in Windows 11. Restart your computer to determine whether the issue still exists.
Solution 2: Check your network adapter.
Ensure that Windows 11 is compatible with your network adapter. Check the manufacturer’s website and install the most recent drivers.
Solution 3: Update Your Network Drivers
Network driver corruption can result in WiFi issues on Windows 11. Verify that updating to the most recent version of your network drivers resolves the issue. You can update the drivers automatically using third-party software such as Driver Booster or by downloading them from the manufacturer’s website.
Utilise Driver Identifier or Driver Identifier if you are faced with difficulties downloading network drivers.
Solution 4: Disable Power Saving Mode
The power-saving mode in Windows 11 may result in WiFi connectivity problems. To disable it, perform the following actions:
In the Settings menu, navigate to System > Power & Sleep.
Select the Additional Power Settings option.
Choose your desired electricity plan.
• Select Modify Plan Preferences.
Select Modify Advanced Power Configurations.
Enhanced Wireless Adapter Configuration
In the Power Saving Mode menu, enter your input.
Configure it for optimal performance.
Choose Apply, then click OK.
Solution 5: Flush the DNS cache.
By clearing the DNS cache, DNS-related WiFi issues may be resolved. Describe how to do it below:
Using the Win key plus X, choose Command Prompt (Admin).
Enter the command below, then press Enter: IP configuration/flushdns
After the command has finished executing, restart your computer.
6th Solution: Reset Network Configuration
Resetting the network settings in Windows 11 can assist in resolving a variety of WiFi issues. Describe how to do it below:
• Navigate to Network & Internet in the Settings menu.
In the menu that appears, select “Network Reset.”
Click Reset at this time.
Perform a computer restart.
Reset the network device and network stack using the command prompt.
Command prompts can be utilized to reset network devices. These commands will reset Winsock, TCP/IP, and sophisticated firewall configurations.
Perform each of the following commands in sequential order, notwithstanding any errors that may occur during execution.
To access the WinX menu, press the Win key plus X.
Select Windows Terminal (Admin) next. When prompted by User Account Control, select “Yes.”
In the designated sequence, enter the following commands into the Windows Terminal window:
After the completion of all commands, proceed to restart your computer. Upon restarting the device, verify whether the Wi-Fi option has been reinstated.
Check for Windows Updates
This is an additional fix for Windows-fresh installation PCs. Utilize the Windows Update tool to identify pending updates from outside companies and Windows, if you have not done so already. These updates may include critical driver releases and problem corrections for network devices.
To access Win + I, press Win.
Launch the Updates tab for Windows in the left pane.
Tap the Check for Updates button. A few seconds will pass while Windows searches for new updates. Download and install them, and restart your computer if possible for the modifications to take effect.
Select Advanced Options from the Windows Update page, followed by this.
After scrolling down, select Optional Updates.
To view all available updates, select Driver Updates. Select an update from the manufacturer of your system, then select Download & Install. Restart your computer for the modifications to take effect.
In the absence of a wired Internet connection, utilize the tethering capabilities of your smartphone.
Lastly, if the issue continues to persist, you may wish to revert to a previous version of Windows 11. This proves to be especially beneficial if the Wi-Fi connectivity problem resurfaces after the implementation of an upgrade.
Launch the Settings > System > Recovery menu. To revert to an earlier version of Windows, select the Go Back icon under Recovery options and then adhere to the on-screen instructions.
On the other hand, this functionality is dependent on the passage of ten days after the execution of an upgrade. In Windows 11, the 10-day rollback period can be extended to 60 days.
Restore Wi-Fi connectivity in Windows 11.
Windows 11 Wi-Fi may malfunction for a variety of reasons. You can, however, frequently resolve the issue with the integrated network troubleshooter. In addition, update or reinstall the network drivers to resolve the issue.
If your wireless network remains invisible to the system, examine the Wi-Fi card for any hardware malfunctions. One may choose to substitute the defective Wi-Fi card with a Wi-Fi adapter as an expedient plug-and-play alternative.
Conclusion
Windows 11 offers advanced wireless diagnostics, including “Map Your Network,” which provides insights into network topology and provides real-time monitoring capabilities. It also includes built-in troubleshooters for common network issues, such as internet connection and network adapter problems. Common causes include outdated drivers, incompatible network adapters, corrupted system files, DNS issues, network configuration issues, and interference from other devices. To resolve WiFi problems in Windows 11, restart your computer, check your network adapter compatibility, and update your network drivers to the latest version.
Windows 11 can cause WiFi connectivity issues by enabling power-saving mode, flushing the DNS cache, and resetting network settings. To fix DNS-related issues, use the Command Prompt to reset network devices, check for Windows updates, and restore the previous version of Windows. Restoring Wi-Fi connectivity in Windows 11 can be done using the built-in network troubleshooter, reinstalling or updating network drivers, and checking for hardware issues. If the problem persists, consider going back to the previous version of Windows or using a Wi-Fi dongle for a quick solution.
FAQS
How do I troubleshoot Wi-Fi on Windows 11?
In most cases, Wi-Fi issues in Windows 11 can be fixed by resetting the device. To accomplish this, proceed along this path: Network Reset can be found under Settings > Network & Internet > Advanced Network Settings. Additionally, interference from nearby devices like cordless phones and microwave ovens can cause Wi-Fi issues.
How do I force Windows 11 to connect to Wi-Fi?
In Windows 11,
To view a list of available networks, select the Network icon in the notification area, then the > icon next to the Wi-Fi fast setting. After selecting the network to which you wish to establish a connection, click Connect.
How do I manually connect to Wi-Fi on Windows 11?
To access fast settings, select the Network, Sound, or Battery icons () in the taskbar’s far right corner. The disconnected icon becomes visible in the absence of a connection. Select the Manage Wi-Fi connections option from the Wi-Fi rapid setting. Select the desired Wi-Fi network, followed by the Connect button.