
Hey there, tech-savvy friends! Are you ready to start making changes to your iOS device? The iOS 17.6 downgrade is a hot topic today, so let’s discuss it. Some apps might not work with the latest update, or you might want a better experience. Downgrading could be the answer. This guide will show you how to smoothly go back to a previous version of iOS on your device. No need to worry, we’ll make it as easy as possible! Get your device ready, buckle up, and let’s go on this trip together. Now is the time to take back control of your iOS experience!
Understanding the Need to Downgrade

If users are having problems with speed, compatibility, or battery life after updating to iOS 17.6, they need to know how to downgrade. If you’re having these problems, going back to an older version of iOS may fix them and make your device stable again.
The iOS 17.6 downgrade can help people whose devices are running slowly or whose apps won’t work anymore. It’s like pressing the “rewind” button to get back to the smooth operation you used to enjoy. The keyword “iOS 17.6 downgrade” emphasizes how quickly and crucial this process is in solving user concerns.
You should also pay attention to compatibility issues. Some apps might not work after the latest iOS update, leaving users without important tools. In this case, the ability to downgrade is a lifesaver because it brings your device and the apps you use every day back into sync.
Also, problems with the power drain can be a real pain after an update. Your once-reliable device can’t hold a charge anymore, so you have to stay close to a power outlet. With the iOS 17.6 downgrade, you’re not only fixing your device; you’re also freeing yourself from having to charge it all the time.
In the end, realizing that you need to drop from iOS 17.6 is about taking back control. It’s about being able to tell when an update does more harm than good and fixing the problem right away. With “iOS 17.6 downgrade,” users can deal with these problems without worry, knowing that there is a way out.
iOS 17.6 downgrade: Check Device Compatibility
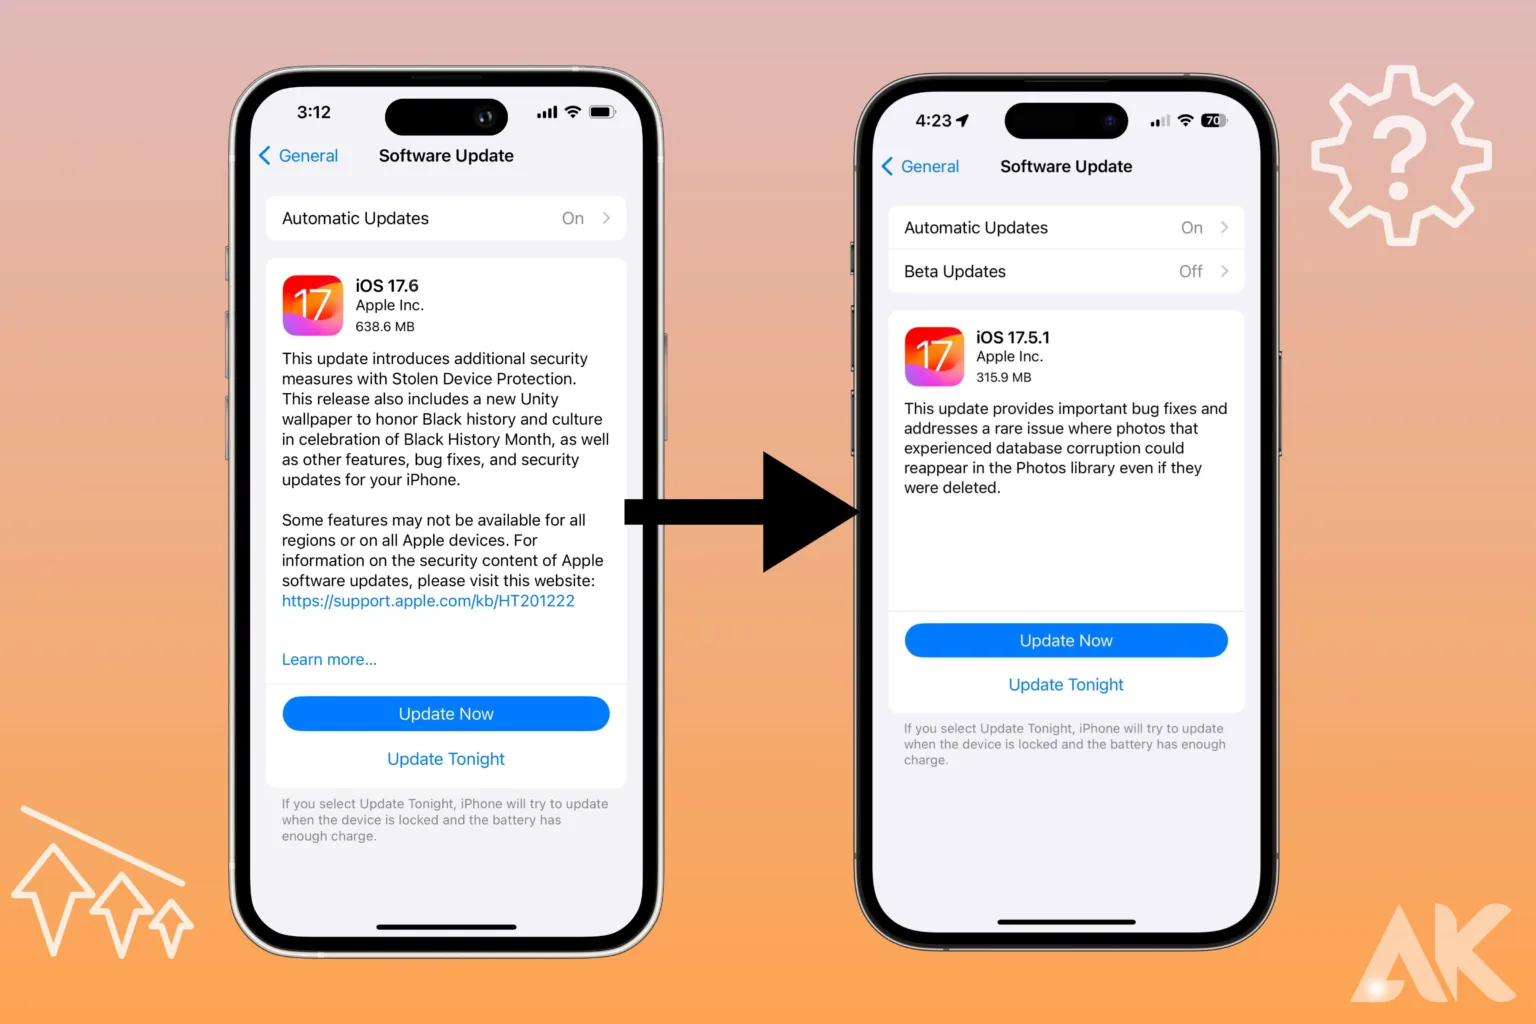
Verifying the target version’s compatibility with your device is essential before beginning the iOS 17. 6 downgrade process. Apple often stops signing older versions of iOS soon after a new version comes out, which shows how important this first step is. You can lower the chance of running into technical problems during the downgrade by checking to see which versions are still supported for your device model.
The phrase “iOS 17.6 downgrade” makes this step even more important by emphasizing how important it is to make sure the switch to an older iOS version goes smoothly. This phrase acts as a beacon, leading users through the complicated device compatibility checks and making it clear why it’s important during the downgrade process.
Going to Apple’s official website or a trustworthy online group can tell you a lot about how compatible different iOS versions are. This is where users can get advice from other fans or look at official paperwork to see if their downgrade plan will work.
Third-party tools like iTunes or specialized software like IPSW.me can also make the testing process easier by showing you all the iOS versions that are compatible with your device. Given this information, users can continue with confidence, knowing that the downgrade path they choose is compatible with their devices.
To sum up, it’s a good idea to do a full compatibility check before starting the iOS 17.6 downgrade. By following this advice and emphasizing how important it is with the keyword “iOS 17.6 downgrade,” users can confidently and clearly handle the downgrade process, ensuring a smooth transition to an older iOS version.
Backup Your Data
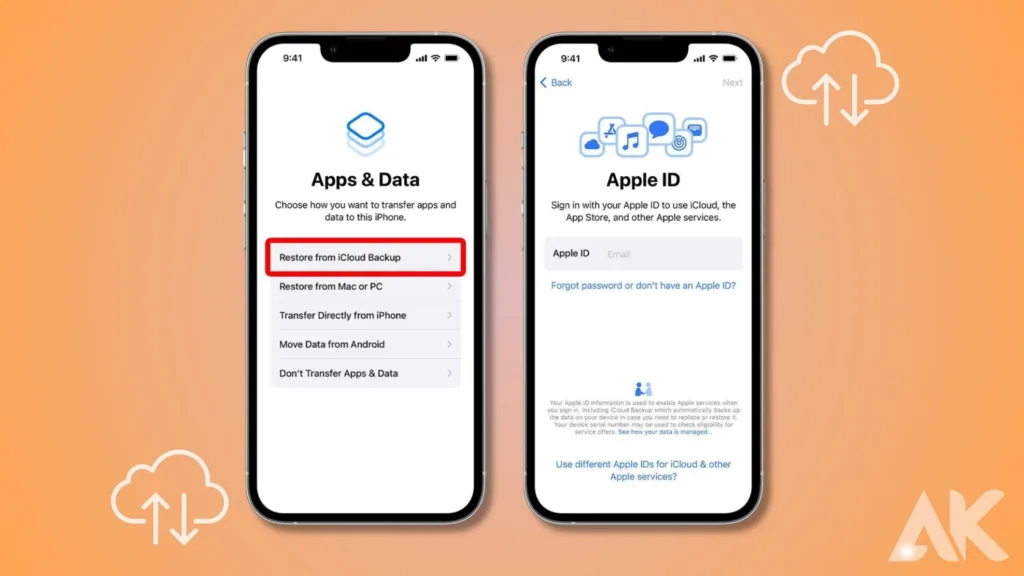
For your safety, you should always back up your files before trying to downgrade iOS, especially to version 17.6. If you want to downgrade iOS 17.6, you have to wipe your device clean and restore an older system version. If you are not careful, this could delete all of your data. So, it’s important to back up your photos, videos, contacts, and other important info safely.
The two main ways to back up your files are through iCloud and iTunes. You can easily back up your info wirelessly with iCloud, making sure it is safe in the cloud. To start an iCloud backup, make sure you’re on a stable Wi-Fi network and go to Settings > iCloud > iCloud Backup. Then, tap “Back Up Now.” There will be no data loss during the iOS 17.6 downgrade process.
Another option is to use iTunes to make a backup on your computer. Use a USB cord to connect your device to your computer. Then, open iTunes and choose your device. There, click “Back Up Now” to start the process of backing up. This method makes sure that your info stays on your computer, which adds an extra layer of security.
Regardless of the way you select, you must make a copy of your data before you begin the iOS 17.6 downgrade. By backing up your data ahead of time, you can make sure you don’t lose any important files during the downgrading process. So, don’t forget to back up your data before you start the iOS 17.6 downgrade.
Download the IPSW File
Getting the IPSW (iPhone Software) file for the desired system version is one of the most important steps in starting an iOS 17.6 downgrade. This file is the basis for putting the older version of iOS back on your device. It is very important to get the IPSW file from a reliable source to avoid getting malware or problems with connectivity.
Start by finding the right IPSW file that works with iOS 17.6. There are many websites that offer IPSW files for different versions of iOS, which makes the downgrade process easy. To protect the security of your device, be careful and only trust sources that you know you can trust.
Once you’ve found the right IPSW file, you can start the download. This file has the software that you need to downgrade your iOS device to version 17.6. During the download, make sure you have a stable internet link to avoid interruptions and damaged files.
Once you’ve downloaded the IPSW file, put it somewhere easy to get to for the next steps in the downgrade process. Do not change the file in any way to keep its purity and use during installation.
A very important step in getting ready for an iOS 17.6 downgrade is downloading the IPSW file. It sets the stage for going back to the desired version of the system and restoring features that are unique to that version. By getting the IPSW file from a reliable source, you strengthen the quality of your downgrade effort and lower the chance of running into problems you didn’t expect. So, be very careful when getting the IPSW file and keeping it safe before you start the iOS 17.6 downgrade process.
Disable Find My iPhone
Before starting an iOS 17.6 downgrade, it is very important to turn off the “Find My iPhone” function. By leaving this feature on, it might get in the way of the update process. Its purpose is to improve device security and help find lost or stolen iPhones. Because of this, you must turn off “Find My iPhone” to update completely without any problems.
Go to the Settings app on your iOS device and turn off “Find My iPhone.” To get to your Apple ID options, tap on your name at the top of the screen. After that, go to “iCloud” and then “Find My iPhone.” Finally, turn off the option by flipping the switch next to “Find My iPhone.”
You can make the iOS 17.6 downgrade process easier by turning off “Find My iPhone.” By taking this action, you make it possible for your device and the firmware to be updated to talk to each other without any problems.
Prioritize the safety and security of your device by turning off “Find My iPhone” before you downgrade. Following this easy but important safety measure can help avoid problems and speed up the downgrade process, eventually resulting in a successful restoration of iOS 17.6.
Don’t forget to turn off “Find My iPhone” before you start the iOS 17.6 downgrade process. This will make sure that everything goes smoothly. By taking this proactive step, you can lower the chances of running into problems and raise the chances of a smooth drop.
Enter DFU Mode
A very important step in starting the iOS 17.6 downgrade process is entering DFU (Device Firmware Update) mode. This mode makes it easier for your device and iTunes to talk to each other, which lets you run an older version of iOS. You can make sure the change goes smoothly by making sure you follow the right steps to get into DFU mode.
Getting into DFU mode may be a little different based on the model of your device. The general steps, on the other hand, work on most iOS devices. First, use a USB cable to connect your device to your computer. Then, make sure iTunes is open and working.
Start the DFU mode procedure on your device next. For most types, you have to press and hold certain buttons in a certain order to do this. Check your device’s directions to find out the exact button combination you need to press to get into DFU mode.
Once you’re in DFU mode, the screen on your device should stay black, which means it’s ready for firmware update. Now, iTunes should see that your device is in DFU mode, which means you can continue with the iOS 17.6 downgrade.
Entering DFU mode essentially sets up a direct communication path between your device and iTunes, which makes installing the older iOS version easier. You can lower the chance of mistakes or problems during the downgrade process by making sure you follow the right steps and put your device in DFU mode.
To sum up, before you start the iOS 17.6 downgrade process, make sure you enter DFU mode properly to make sure everything goes smoothly. If you follow the steps that are special to your device model, you’ll be able to easily get through the DFU mode sequence and start the downgrade process.
Connect to iTunes
Connecting your device to iTunes is the next important step in the iOS 17.6 downgrade process. Make sure you can get into DFU (Device Firmware Update) mode first. By doing this, you make a necessary link between your device and the iTunes software on your computer, which makes it easier to restore the older iOS version.
Start by using a USB connection to connect your device to your computer. Before you go any further, make sure that iTunes is open and running on your machine. If you turn on DFU mode on your device, iTunes should immediately find it in recovery mode once you connect it.
When iTunes finds your device, it will ask you to recover it. This message tells you that iTunes has found that your device is ready for firmware loading and is ready to start the downgrade process.
When asked, you can choose to restore your device to its original settings to move on with the restoration process. By doing this, you will reinstall iOS 17.6 on your device, which will essentially downgrade it from the latest version to the older one you want.
The last step in a successful iOS 17.6 downgrade is to connect your device to iTunes. By setting up this connection, you let iTunes talk straight to your device, which makes installing the older iOS version easier.
Finally, the next important step in the iOS 17.6 downgrade process is to connect your device to iTunes after entering DFU mode. By carefully following these steps, you can make sure that the downgrade goes smoothly and quickly, returning your device to the older iOS version you want.
Select the IPSW File
Picking the right IPSW (iPhone Software) file is very important in the last steps of the iOS 17.6 downgrade process. This file has the software you need to take your device back to an older version of iOS. You can make sure the switch to iOS 17.6 goes smoothly by carefully following these steps.
Open iTunes on your computer and plug in your device using a USB connection. To restore your iPhone, open iTunes and hold down the “Option” key (Mac) or the “Shift” key (Windows). At the same time, click the “Restore iPhone” button in iTunes. This action brings up a window where you can choose the IPSW file you got earlier for the downgrade.
Find the place where you saved the IPSW file and click on it. To make sure that the downgrade works, make sure that you pick the IPSW file that is compatible with iOS 17.6. After making your choice, click “Open” to start the firmware download.
As long as you choose the right IPSW file, iTunes will load the iOS 17.6 firmware on your device, which is the opposite of what it does now. This is the last step in getting your device back to the older version of iOS that you want.
The firmware version your device will be returned to is based on the IPSW file you choose. This is a very important step in the iOS 17.6 downgrade process. After carefully following these steps and picking the right IPSW file, you should be able to finish the downgrade process and use your device with iOS 17.6 features again.
Wait for the Downgrade to Complete
After choosing the IPSW file and starting the downgrade in iTunes, everything else you need to do is wait for the iOS 17.6 downgrade to finish. It might take a while to finish this process because it involves putting the older version of iOS back on your device. To avoid any problems or interruptions, it’s important to be patient and not stop your device during this time.
As iTunes starts the downgrade process, your device will go through different stages of setting up and installing software. During this process, your device may restart more than once, and the screen may show progress bars that show how far along the change is.
It’s important to stay alert during this time and keep an eye on how the iOS 17.6 downgrade process is going in iTunes. Do not use your device or do anything else that could get in the way of the download process. This means you shouldn’t unplug your device from your computer or open another app while iTunes is running.
The iOS 17.6 downgrade process could take a long time or a short time, depending on your computer’s speed and the size of the IPSW file. It doesn’t take long for the process to finish, so it’s important to be patient and let iTunes finish the update without stopping.
If you choose to update, iTunes will let you know, and your device will restart itself. After this, you can disconnect your device from your computer and start using it with iOS 17.6 newly loaded.
If you wait calmly for the downgrade to finish and don’t do anything else, you can make sure that the upgrade to iOS 17.6 goes smoothly on your device.
Conclusion
When thinking about an iOS 17.6 downgrade, one should think about how it might help fix interface problems or make the device run faster. By carefully following the steps, users can confidently go through the process and make a smooth return to an older version of iOS. If you want to get back to a familiar interface or fix software issues, the iOS 17.6 downgrade is a good way to get your device working again. By taking this method, users can regain control over the operating system on their device, making the experience smoother and more satisfying.
FAQS
Q1: Is it possible to downgrade from iOS 17.6 to any previous version?
A. While it’s generally possible to downgrade to previous iOS versions, Apple only signs older versions for a limited time after releasing a new update. You’ll need to check which versions are still being signed for your device.
Q2: Will downgrading iOS erase all my data?
A. Yes, downgrading iOS involves wiping your device clean, so it’s essential to back up all your data before proceeding with the downgrade process.
Q3: Can I downgrade my iOS device without a computer?
A. No, downgrading iOS requires connecting your device to iTunes on a computer. There’s currently no way to downgrade iOS directly from the device itself.
Q4: What should I do if I encounter errors during the downgrade process?
A. If you encounter any errors during the downgrade process, try restarting your device and computer, ensuring you have a stable internet connection, and using a different USB cable or port if necessary.
Q5: Is it possible to downgrade iOS without losing my jailbreak?
A. Downgrading iOS typically requires restoring your device to factory settings, which would remove any jailbreak. If you want to preserve your jailbreak, it’s best to avoid downgrading iOS unless absolutely necessary.