
iOS 17.5 update It’s important to update your iPhone or iPad to the most recent iOS version—iOS17.5, for example—to verify that it remains safe and includes all the newest features. It’s like giving a device a minor makeover to maintain optimal functionality and guard against problems or problems. Updating to iOS frequently brings great new features that can improve your device’s usability, so it’s worth the time. We’ll make it simple for you to update your smartphone to iOS 17.5 by taking you step-by-step through the procedure in this tutorial!
Check Device Compatibility
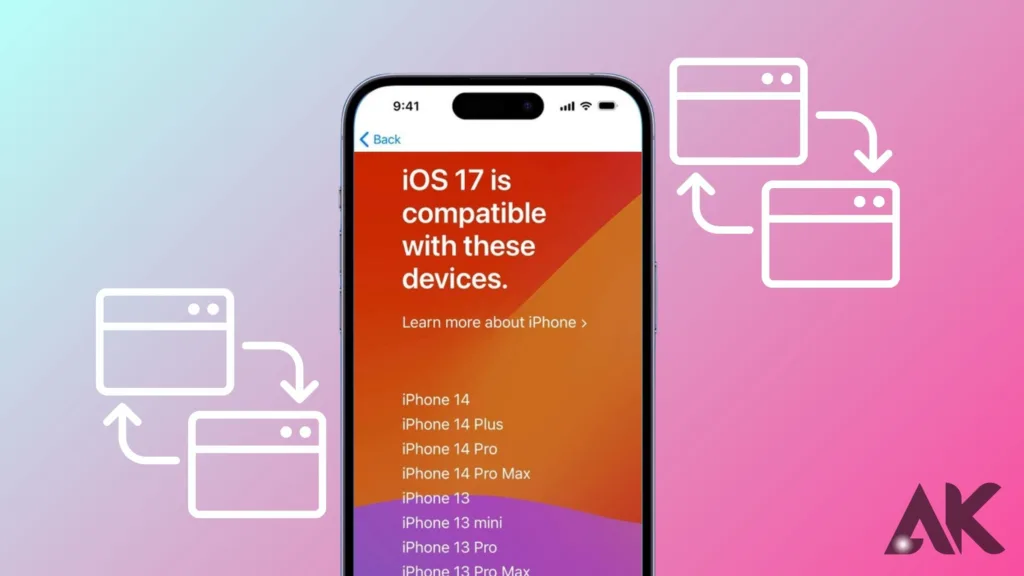
The most important thing to do before updating to iOS 17.5 is to make sure your device is compatible. Compatibility means that the new software and its features will function perfectly on your device. Many devices, including the iPhone 6s and later, iPad Air 2 and later, iPad mini 4 and later, and the iPod touch (7th generation), are compatible with iOS 17.5. Go to the Settings app, choose General, and then touch Software Update to verify compatibility. You’ll notice an option to download and install iOS 17.5 if your device is compatible. If not, you might want to think about getting a newer model of your device so you can use the newest iOS features.
Making sure your device is compatible with iOS 17.5 is essential to a successful update. You might not be able to use the newest features and security improvements if your device is incompatible. Running an unsupported iOS version can also result in possible security flaws and performance problems. Upgrade to a newer model that supports the most recent iOS updates if your device isn’t compatible with iOS 17.5. This will guarantee that you can keep using Apple’s newest features and improvements.
Backup Your Data
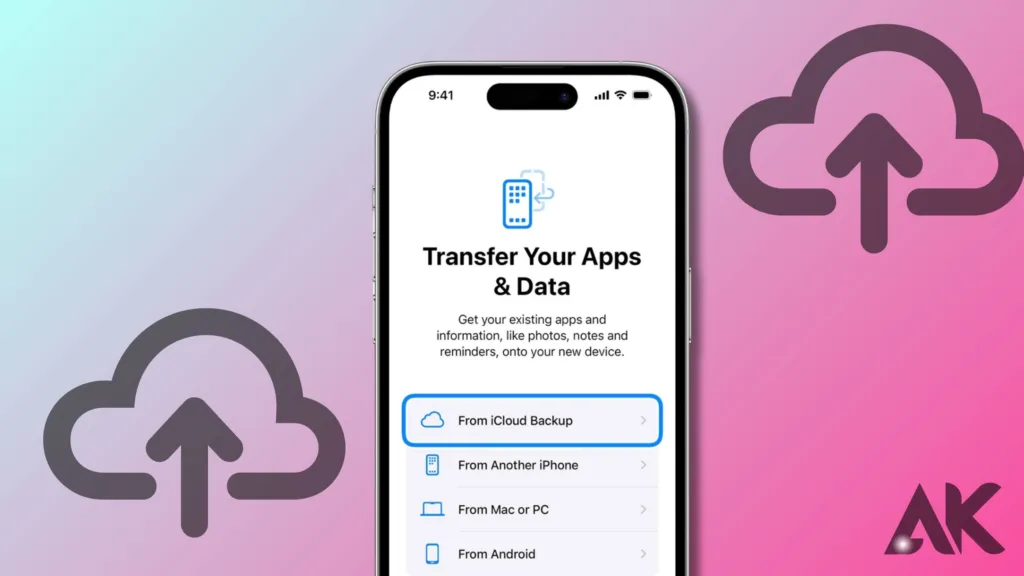
Before updating your iPhone or iPad to iOS 17.5, making a backup of your data is important. This guarantees that in the unlikely event that an update procedure goes awry, you won’t lose any crucial data. The two primary methods are you can back up your data via iTunes or iCloud.
To create an iCloud backup, go to Settings on your device, tap on your name at the top, choose iCloud, and then tap on iCloud Backup. Lastly, to start the backup process, touch on Back Up Now.
As a replacement, iTunes can be used to back up your data. After connecting your gadget to your PC, launch iTunes, and choose your device. To begin the backup process, click on Back Up Now after selecting Summary from the sidebar.
Before installing the iOS 17.5 update make sure that your backup is finished. If something goes wrong during the upgrade process, you can recover your data in this method.
Connect to a Stable Wi-Fi Network
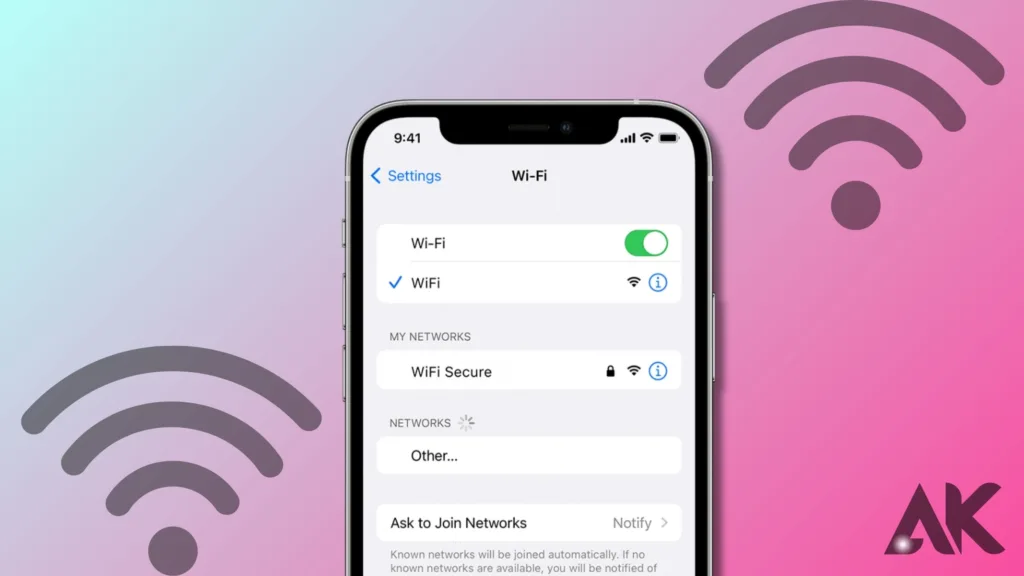
Before installing iOS 17.5, make sure you’re connected to a reliable Wi-Fi network on your iPhone or iPad. The likelihood of mistakes or problems during the update is decreased with a steady Wi-Fi connection, which guarantees an easy updating procedure.
Going to the Settings app on your device and selecting Wi-Fi will connect you to a reliable Wi-Fi network. From the list of accessible networks, pick a Wi-Fi network and, if necessary, enter the password. After connecting, ensure there are no disruptions to the update process by ensuring the Wi-Fi signal is strong and consistent.
Because downloading the iOS 17.5 update over a cellular network may result in additional costs or slower download speeds, you must connect to a stable Wi-Fi network. In addition, a steady Wi-Fi connection minimizes any errors or problems that can arise from an unstable connection by guaranteeing that the update is downloaded and installed appropriately.
Charge Your Device
It is important to confirm that your iPhone or iPad has enough battery life or is powered on before updating to iOS 17.5. Enough energy is crucial to keep your device from shutting down during the update process, as updating can drain a considerable amount of battery life.
Go to Settings and touch on Battery to see the current battery level on your device. It is advised to charge your device to at least 50% before beginning the update if your battery is low. Your device can be charged by USB connection to a computer or using the charger and cord that come with it.
If the battery life of your smartphone is too low to update, plug it in and give it some time to charge before trying again. To prevent your gadget from running out of battery halfway through the update process, it’s also a good idea to keep it plugged into the power source.
Update Over the Air
The over-the-air iOS 17.5 update for your iPhone or iPad is a quick and easy process. Here’s how to accomplish it:
Connect with a wifi network
Make sure your device is linked to a reliable Wi-Fi network before beginning the update. This guarantees a more dependable and quick download and installation procedure.
Backup your device
Making a backup of your smartphone is usually a good idea before updating. To guarantee that you don’t lose any crucial data, you can accomplish this by utilizing iTunes or iCloud.
Check for any updates
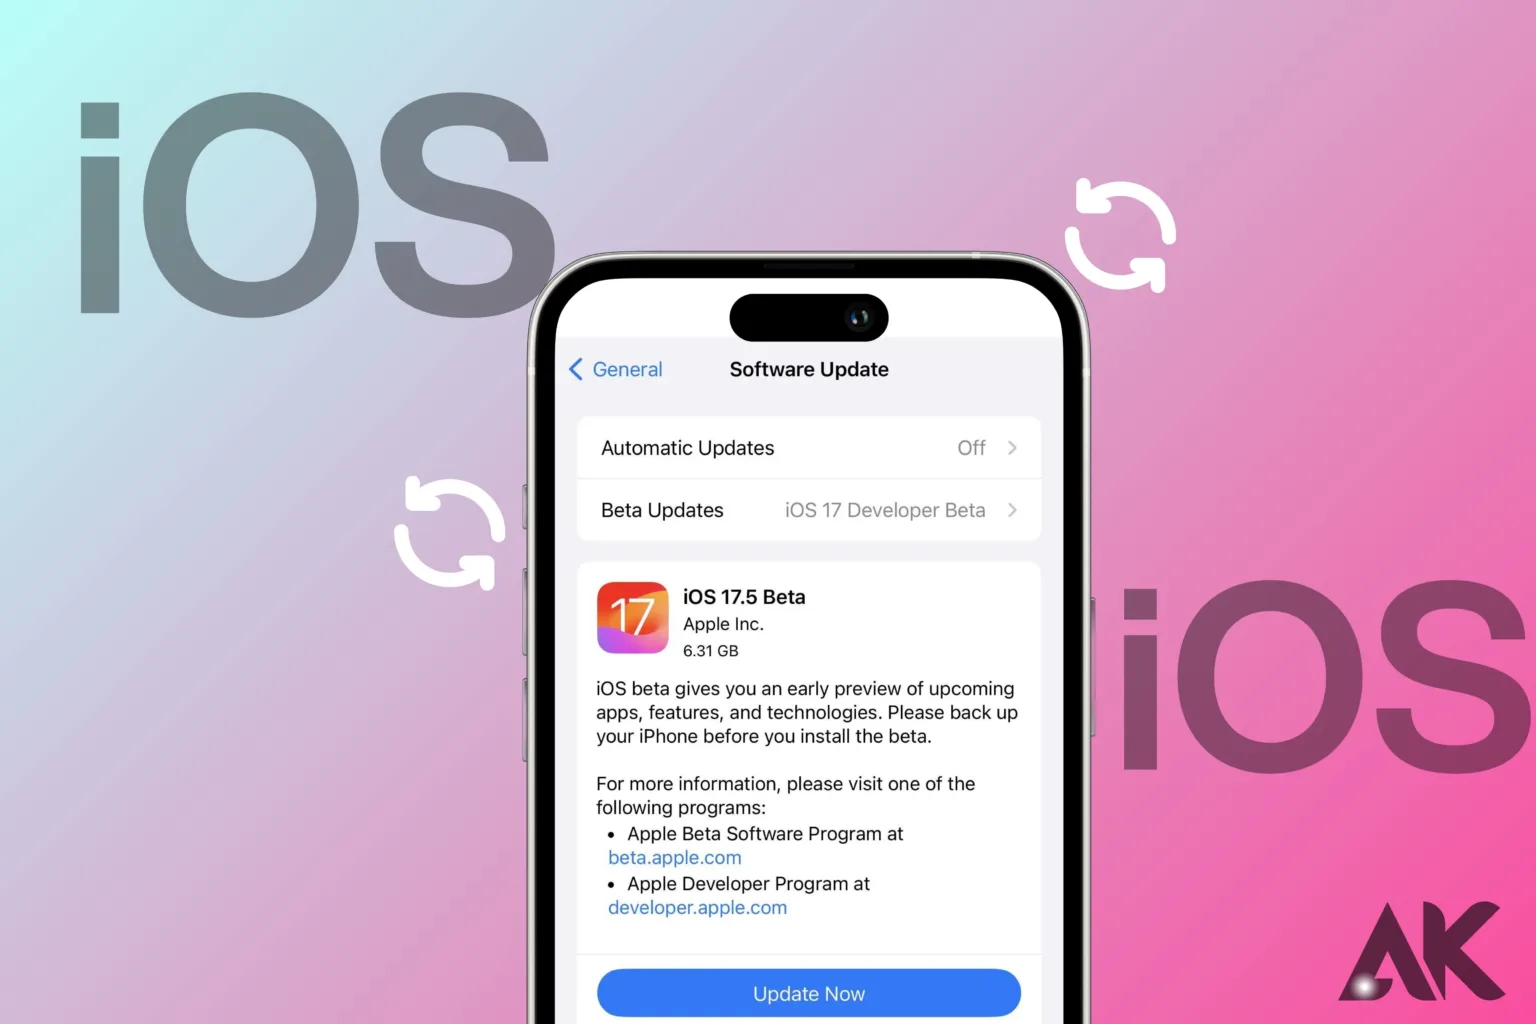
To find out if iOS 17.5 is compatible with your smartphone, navigate to Settings, General, and finally select Software Update. When the update is available, your device will search for it and display a download and install option.
Install the update after downloading it
Click on Download and Install to see whether iOS 17.5 is available. It might be necessary for you to accept the terms and conditions and enter your passcode. After the update has finished downloading, select Install Now to start the installation process.
Wait until the update is finished
The update procedure will start when your device restarts. Be patient and don’t try to rush the procedure because it could take some time. Your smartphone will restart after the update is finished, and you will be running iOS 17.5.
A quick and easy method to make sure you have the newest features and security upgrades on your smartphone is to update it to iOS 17.5 over the air. To prevent any data loss, just remember to make a backup of your device before updating.
Update Using iTunes
Updating your iPhone or iPad to iOS 17.5 using iTunes is a straightforward process. Here’s how you can do it:
Connect your device to your computer
Use a USB cable to connect your iPhone or iPad to your computer. If iTunes doesn’t launch automatically, open it.
Select your device
Once your device is connected, it should appear in iTunes. Click on the device icon in the top left corner of the iTunes window to select your device.
Check for the update
In the Summary tab, click on “Check for Update.” iTunes will check if iOS 17.5 is available for your device. If it is, you’ll see an option to download and install it.
Download and install the update
Click on “Download and Update” to start the update process. iTunes will download the iOS 17.5 update and install it on your device. Keep your device connected while the update is being installed.
Wait for the update to complete
The update process may take some time, depending on your internet connection and device. Once the update is complete, your device will restart, and you’ll be running iOS 17.5.
Updating your device to iOS 17.5 using iTunes is a reliable way to ensure you have the latest features and security updates. Just make sure to back up your device before updating to avoid any data loss.
Post-Update Steps
After updating your iPhone or iPad to iOS 17.5, there are a few post-update steps you may need to take:
Set up Face ID or Touch ID
If your device supports Face ID or Touch ID, you may need to set it up again after the update. Go to Settings > Face ID & Passcode or Settings > Touch ID & Passcode to do this.
Sign in to iCloud and other accounts
After the update, you may need to sign in to iCloud and other accounts, such as your Apple ID, email, and social media accounts.
Restore your data
If you backed up your data before the update, you can now restore it to your device. Go to Settings > General > Reset > Erase All Content and Settings, then follow the on-screen instructions to restore your data from iCloud or iTunes.
Update your apps
After updating to iOS 17.5, you may also need to update your apps from the App Store to ensure they are compatible with the new operating system.
Check for issues
Lastly, it’s a good idea to look for any faults or problems that might have arisen throughout the update process after it’s over. Should you run into any problems, you can resolve them by restarting your device or by getting in touch with Apple Support.
You may make sure your device is configured correctly and ready to use with iOS 17.5 by following these post-update instructions.
Conclusion
iOS 17.5 update It’s important to iOS 17.5 update on your iPhone or iPad if you want to be sure of performance, security, and access to the newest features. You can quickly update your smartphone and take advantage of the newest iOS version by following the detailed instructions, which include verifying compatibility, backing up your data, and updating over the air or through iTunes. Updating your smartphone guarantees a seamless and enjoyable user experience in addition to improving its functioning.
FAQ
Q1: Explain iOS 17.5.?
The most recent version of Apple’s mobile operating system, iOS 17.5, comes with security upgrades, enhancements, and new features.
Q2: Is it free to download iOS 17.5?
It is indeed free to download and install iOS 17.5 on compatible devices.
Q3: What is the duration that is required for iOS 17.5 update?
The duration of the iOS 17.5 update is contingent upon the speed of your device and internet connectivity. It usually takes between thirty and sixty minutes.
Q4: Will my data be erased when I update to iOS 17.5?
No, your data shouldn’t be erased when you update to iOS 17.5. To prevent any potential loss, it’s a good practice to back up your data before updating.
Q5: Is it possible to revert to an earlier version of iOS 17.5?
After a new release, Apple usually permits reverting to the prior iteration of iOS for a brief time. For the most recent details about downgrading, it’s advisable to visit Apple’s support page.