
Do you want to protect your Windows computer’s internet connection? Learning how to configure OpenVPN on Windows is the straightforward solution. It’s among the most dependable methods for safely browsing and protecting your info.
Even if you’re not tech-savvy, you’ll learn 7 easy steps to easily set up OpenVPN in this article. OpenVPN is a wise choice whether you’re working remotely, need to access geo-restricted material, or simply want more privacy. This article is intended to assist both novice and expert users in configuring OpenVPN correctly and without misunderstanding.
By the conclusion, your Windows PC will have a private, secure connection operational. Let’s begin with the detailed instructions to ensure a quick, easy, and safe setup.
Why Choose OpenVPN for Windows?

Before jumping into the setup process, here’s a quick overview of why OpenVPN is a great option for Windows users:
- Strong encryption: Uses AES-256 encryption, a top-level industry standard.
- Highly configurable: Offers advanced options for both beginners and power users.
- Open-source: Constantly reviewed and updated by a global community.
- Cross-platform: Works across Windows, macOS, Linux, and more.
System Requirements
To ensure a smooth installation, make sure your system meets the following minimum requirements:
| Requirement | Minimum Spec |
|---|---|
| Operating System | Windows 10 or later |
| Processor | 1 GHz or faster |
| RAM | 2 GB minimum |
| Disk Space | At least 100 MB free |
| Internet Connection | Required for download and configuration |
Step 1: Download the OpenVPN Client

The first step in how to configure OpenVPN on Windows is downloading the official OpenVPN client.
Instructions:
- Go to the OpenVPN Community Downloads page.
- Under Windows, select the latest stable version.
- Download the
.exeinstaller file.
Tip: Always download from the official site to avoid malware.
Step 2: Install the OpenVPN Client

Once the file is downloaded, the next step is installation.
Instructions:
- Double-click the
.exefile to launch the installer. - Click Yes if Windows prompts for permissions.
- Follow the on-screen instructions:
- Choose default settings unless you need custom options.
- Ensure OpenVPN Service is checked before proceeding.
- Click Install, then Finish.
After installation, a new OpenVPN GUI icon will appear on your desktop or in your system tray.
Step 3: Download Configuration Files
To connect to a VPN server, you need .ovpn configuration files from your VPN provider or server administrator.
Common sources for .ovpn files:
- Commercial VPN providers (e.g., NordVPN, ProtonVPN)
- Company IT departments for remote access
- Self-hosted OpenVPN servers
What to Look For:
.ovpnfiles- Optional:
.crtand.keyfiles (certificates and keys)
Place all configuration files in a single folder for easy access.
Step 4: Add Configuration Files to OpenVPN Directory
Now that you’ve downloaded your configuration files, you’ll need to move them to the OpenVPN config folder.
Steps:
- Navigate to
C:\Program Files\OpenVPN\config. - Copy your
.ovpnfile and any certificate files into this folder. - You may need admin rights to do this. Right-click the file and select Run as administrator if prompted.
Important: Each .ovpn file represents a separate VPN server or connection.
Step 5: Launch OpenVPN GUI as Administrator
For OpenVPN to function properly, it needs administrative access.
Instructions:
- Right-click the OpenVPN GUI icon on your desktop or in your Start menu.
- Choose Run as administrator.
- The GUI will now appear in the system tray (usually as a monitor with a lock icon).
If you skip this step, the connection may fail due to insufficient privileges.
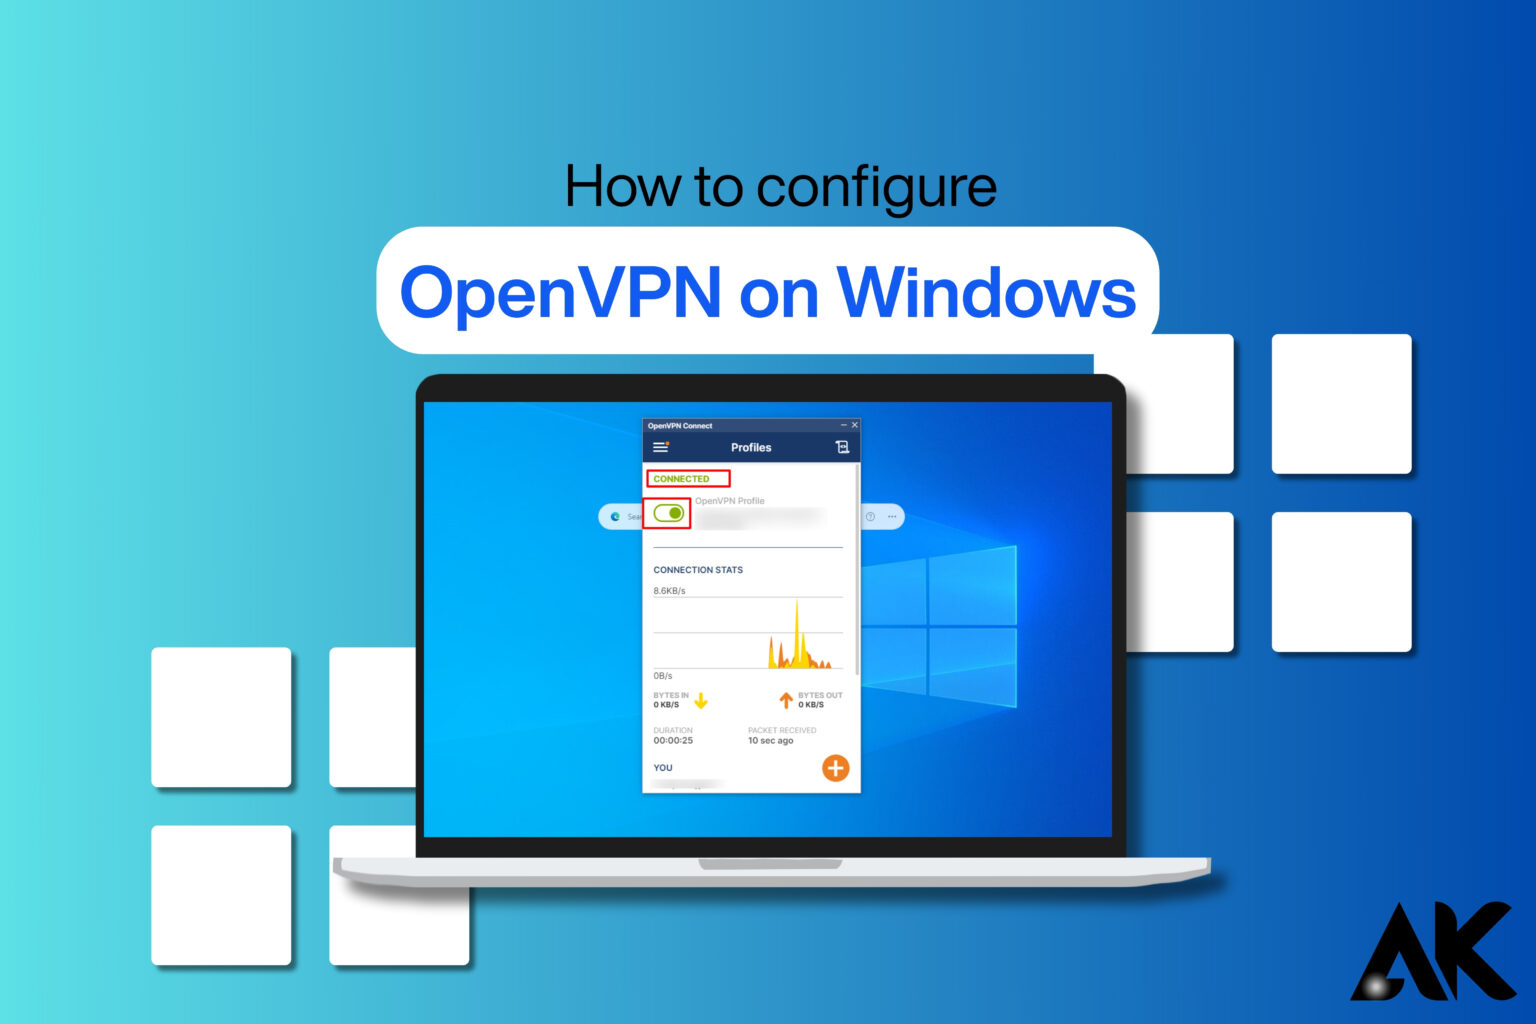
Step 6: Connect to the VPN Server
With everything in place, it’s time to connect to your VPN server.
Instructions:
- Click the OpenVPN GUI icon in the system tray.
- Right-click on the profile (based on your
.ovpnfile name). - Select Connect.
- A status window will open showing connection logs.
- Once connected, the tray icon will turn green.
Note: If your connection requires a username and password, you will be prompted to enter them.
Step 7: Verify the VPN Connection
You’ve completed the main steps of how to configure OpenVPN on Windows, but it’s essential to make sure the connection is active and secure.
Ways to verify:
- Visit https://whatismyipaddress.com before and after connecting.
- You should see a different IP address after the VPN is active.
- Check the OpenVPN log in the status window for any errors.
- Test connectivity to your intended service (e.g., internal server, streaming platform, etc.)
Common Configuration Tips
To further optimize your OpenVPN experience on Windows, consider these helpful tips:
Adjust DNS Settings
Sometimes DNS leaks can reveal your real IP. You can:
- Use custom DNS servers like Cloudflare (1.1.1.1) or Google DNS (8.8.8.8)
- Add
block-outside-dnsto your.ovpnfile
Enable Auto-Start
Want OpenVPN to start with Windows?
- Press
Win + R, typeshell:startup, and press Enter - Add a shortcut to
OpenVPN GUIin that folder - Make sure it’s set to run as administrator
Use Multiple Profiles
You can store several .ovpn files in the config folder for quick switching between servers or regions.
Troubleshooting Tips
If you hit any snags during setup, here are some solutions:
Connection Fails to Start
- Make sure you ran OpenVPN GUI as administrator
- Check if your
.ovpnfile is correctly formatted - Ensure no firewall or antivirus is blocking the connection
VPN Connected but No Internet
- This is often a DNS issue
- Try using different DNS settings as mentioned above
Frequent Disconnects
- Use a more stable server
- Switch to UDP or TCP depending on what your
.ovpnfile specifies
Final Thoughts
Now you know how to configure OpenVPN on Windows in just seven easy steps. Whether you’re accessing sensitive data, bypassing censorship, or securing your internet on public Wi-Fi, OpenVPN provides a reliable and private solution.
Quick Recap of the 7 Steps:
- Download the OpenVPN Client
- Install the OpenVPN Client
- Download Configuration Files
- Add Files to OpenVPN Directory
- Launch OpenVPN as Administrator
- Connect to the VPN Server
- Verify the VPN Connection
OpenVPN setup doesn’t have to be difficult. You may connect quickly and securely with the aid of this tutorial, which provides a simple, step-by-step procedure. Start using OpenVPN right now if you’re prepared to take charge of your online privacy.
FAQs
Question: What is the easiest way to configure OpenVPN on Windows?
Answer: The easiest way to configure OpenVPN on Windows is to install the OpenVPN client, add your .ovpn configuration files, and connect using the GUI as admin.
Question: How to configure OpenVPN on Windows for a secure connection?
Answer: To configure OpenVPN on Windows, install the OpenVPN client, add your .ovpn files to the config folder, and connect through the GUI with admin rights.
Question: Is it difficult to learn how to configure OpenVPN on Windows?
Answer: No, learning how to configure OpenVPN on Windows is easy with the right steps. This guide simplifies the setup process, even for beginners.